
Driving your 2017 Range Rover Evoque is quite the experience. But every once in a while you might run into a roadblock. Well, not an actual roadblock, but more a metaphorical one in the form of a flat tire.
This can mean big trouble if your out of town, or on a road trip. Stopping in the middle of nowhere, with no cell phone reception can be stressful and potentially dangerous. This can happen to the owners of both a brand new and used Land Rover car.
Driving with a flat tire is not an option. First, it can damage the tire beyond repair, or worse, it can lead to wheel and vehicle damage. Ultimately, you don't want to do this, as it results in poor vehicle handling and control, which is known to lead to possible accidents or injuries.
In these cases, drivers with a spare wheel can survive without knowing how to use the tire repair kit, and can simply replace the one with a flat tire and go on with their day.
Those who don't have it will have to roll up their sleeves and repair the tire on their own. Fortunately, this is not an overly complicated thing to do, as long as you stick to the instructions. Here is how to use the 2017 Range Rover Evoque Tire Repair Kit.
Where to Find the Tire Repair Kit?
The tire repair kit is located in your Range Rover’s load space. Lift your floor panel to find it. Please note that the tire repair kit is one of those one-time-use-only items, which means that you will be able to use it to repair one punctured tire. The 2017 Range Rover Evoque tire repair kit consists of three items:
- - Compressor – a device to help you inflate the tire.
- - Sealant bottle – a compound designed to actually help you repair the tire. It is important to know that this sealant has a shelf life. Make sure to check the tire sealant bottle to make sure that it is still viable. If it is not, you will need to replace the container before the expiry date. You will also have to replace it after each use.
- - Locking wheel nut adaptor.
When Can You Use the Tire Repair Kit?
Unfortunately, not all tire damage can be repaired with Range Rover’s tire repair kit. The sealant is able to repair the tires with punctures that are within the tread area and no wider than 6 mm in diameter. If your tire gets damaged more severely, or the damage is on the tire’s sidewall, you will have to seek professional assistance.
Tires with structural damage, which often comes as a result of driving a vehicle with an under-inflated tire cannot be repaired with the tire repair kit.
How To Use the 2017 Range Rover Evoque Tire Repair Kit
Before you start repairing the tire there are several things that you have to do to ensure your, and everyone else’s safety:
- - If there is anybody else in the car, inform them that you are going to perform the procedure.
- - Make sure that your gear selector is in the Park position.
- - Switch off the engine.
- - Apply the Electric Parking Brake.
- - Turn on the hazard warning lights.
- - Remove the smart key and exit the vehicle.
Step 1 – Set Up Your Gear
Open the Tire Repair Kit
To successfully repair a tire, you will need to create a sort of workspace. The first thing to do is to open the tire repair kit and peel off the maximum speed label. You should attach this label anywhere where you can see it clearly when driving, without covering any warning lamps or the instruments on your dashboard.
Get the Gear Ready
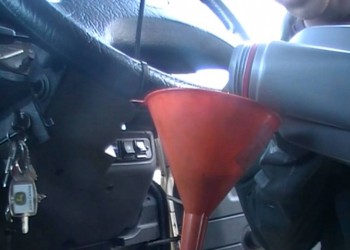
To use the compressor, you will need to uncoil its power cable and the inflation hose. Next, you want to take the sealant bottle and unscrew the orange cap located on the bottle receiver. Unscrew the sealant bottle cap. Screw the sealant into the receiver (clockwise) and make sure that it is completely tight.
Set Up the Gear
Now it is time to connect everything. Start by removing the valve cap from the tire you want to repair. Take the inflation hose, remove the protective cap from it, and connect it to the tire valve. Double check to see whether the hose is screwed fully on the tire valve.
Before connecting the compressor, make sure that it is turned off (switch is in the O position). Take the compressor power cable connector and insert it into a 12V power socket. Bear in mind that the manufacturer strongly recommends that you use this power socket instead of the cigar lighter one.
Step 2 – Repair and Inflate the Tire
Turn on the Engine and Compressor
After making sure that you did everything according to the guide so far, you can enter your vehicle and turn the engine on (if the vehicle is in a well-ventilated area). Go back to the compressor unit and turn it on, by switching it to the I position. Make sure to inflate the tire to a minimum of 1.8 bar (26 psi, 180 kPa). You shouldn’t inflate it over the 3.5 bar (51 psi, 350 kPa) maximum.
While you are inflating the damaged tire, the sealant will be also pumped through the tire valve. This is why you may see sealant leaking from the hole on the tire. This is normal. During the inflation, the pressure in the tire will rise up to 6 bar (87 psi, 600 kPa).
This drops back to normal after 30 seconds to 1 minute. As the sealant leaks, you want to make sure to remove it as soon as possible, as it will create a hard residue on your tire surface that is very difficult to remove once it settles.
Make Periodic Pressure Checks
The entire inflation process can take up to 10 minutes. During this time, you will have to switch the compressor off for a moment to check the tire pressure (there is a gauge unit mounted on it). If the tire doesn’t reach a pressure of 1.8 bar (26 psi, 180 kPa) in this time, you shouldn’t use it.
Finish and Pack Your Gear
Once you are done, you will have to switch the compressor off and then turn the car’s engine off. Disconnect the compressor by removing the connector from the power socket. Remove the inflation hose by carefully unscrewing it from the tire valve, and return the protective cap on it. Put the tire valve cap back on.
Pack your gear back into the vehicle, but make it easily accessible, as you will have to check the tire pressure in the next half hour. Enter your vehicle and drive for 3 to 10 km. This will help the sealant coat the inner surface of the damaged tire and better seal the puncture.
Check the Tire Pressure
After 3 to 10 km, you will have to reconnect the compressor to the tire, but this time you don’t have to connect it to a power source or turn it on. Take a look at the gauge and read the pressure:
- - If it is below 1.3 bar (19 psi, 130 kPa) you have to stop driving.
- - If it is above 1.3 bar (19 psi, 130 kPa) but below 1.8 bar (26 psi, 180 kPa) you will have to repeat the procedure from Step 2 – Turn on the Engine and Compressor. Once you get the desired pressure, repeat the procedure from Step 2 – Finish and Pack your Gear.
As you can see, learning how to use the 2017 Range Rover Evoque Tire Repair Kit is not that hard. Knowing this can help you get to the nearest tire specialist, as repaired tires shouldn’t be used for more than 200km. Finally, make sure to dispose of the sealant bottle according to the local waste disposal regulations.


0 comments